Prerequisites
Use an AWS account with permission to subscribe in AWS Marketplace. If you do not already have an AWS account, you can start with an AWS Free Tier account.
Make sure you can subscribe in AWS Marketplace and create CloudFormation stacks in the target region, typically us-east-1.
For a broader overview of AWS prerequisites and launch guidance, see the AWS landing page prerequisites.
1
Marketplace
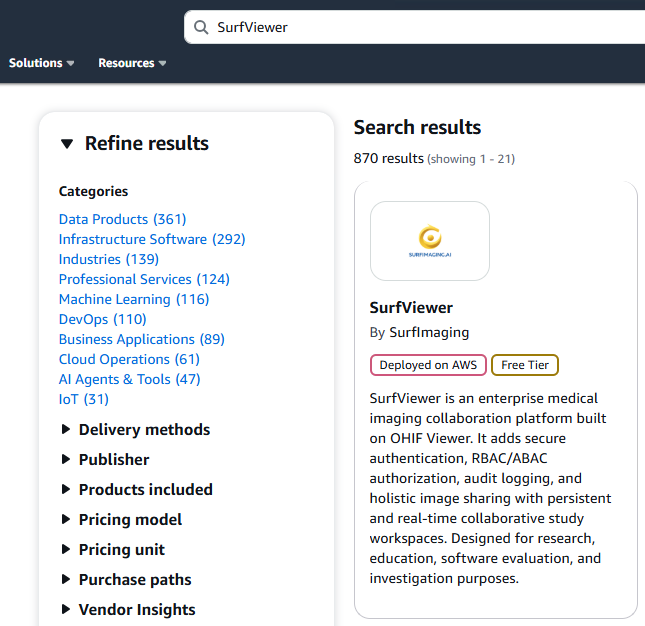
Find SurfViewer in AWS Marketplace
- Open AWS Marketplace and locate the SurfViewer offer.
- Review the product page to confirm you are working with the correct listing.
- Open the offer to continue into purchase options.
2
Marketplace
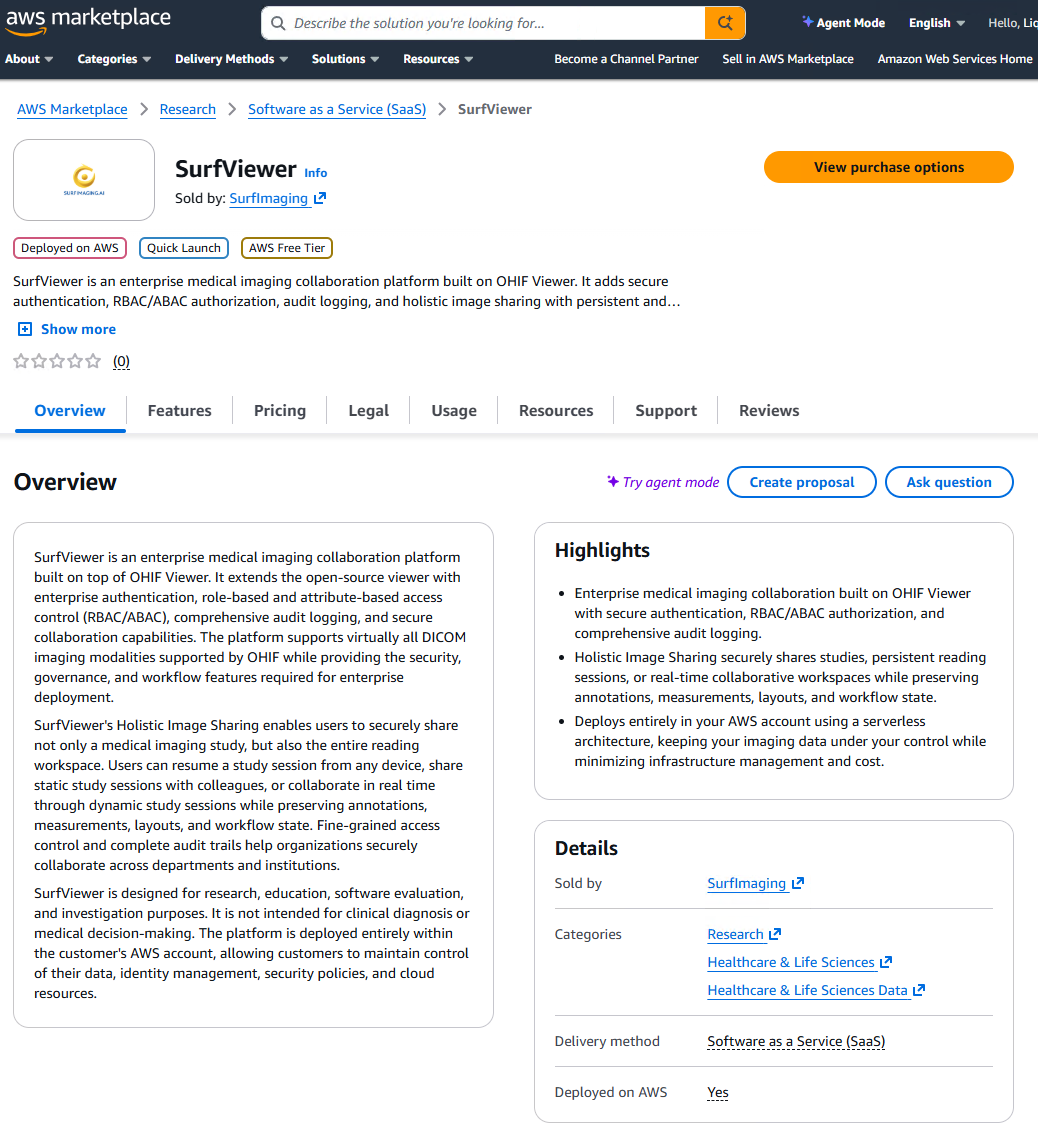
Review the purchase options
- Open the purchase options for the SurfViewer offer.
- Review the AWS Marketplace message that the product subscription is free of charge, has no end date, and can be canceled at any time.
- Note that separate AWS infrastructure costs may still apply to the resources deployed in your account.
- Subscribe.
3
Marketplace
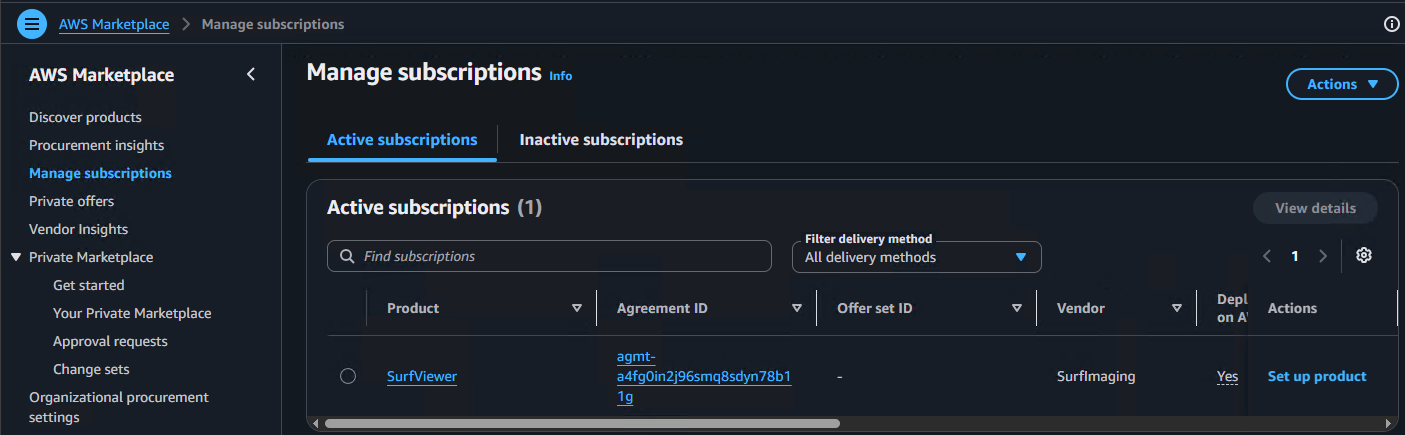
Open SurfViewer from Manage subscriptions
- Open Manage subscriptions in AWS Marketplace.
- Find the active SurfViewer subscription in the list.
- Select Set up product to continue into the buyer setup flow.
This page confirms that SurfViewer is already an active subscription and is ready for buyer-side setup.
4
Setup
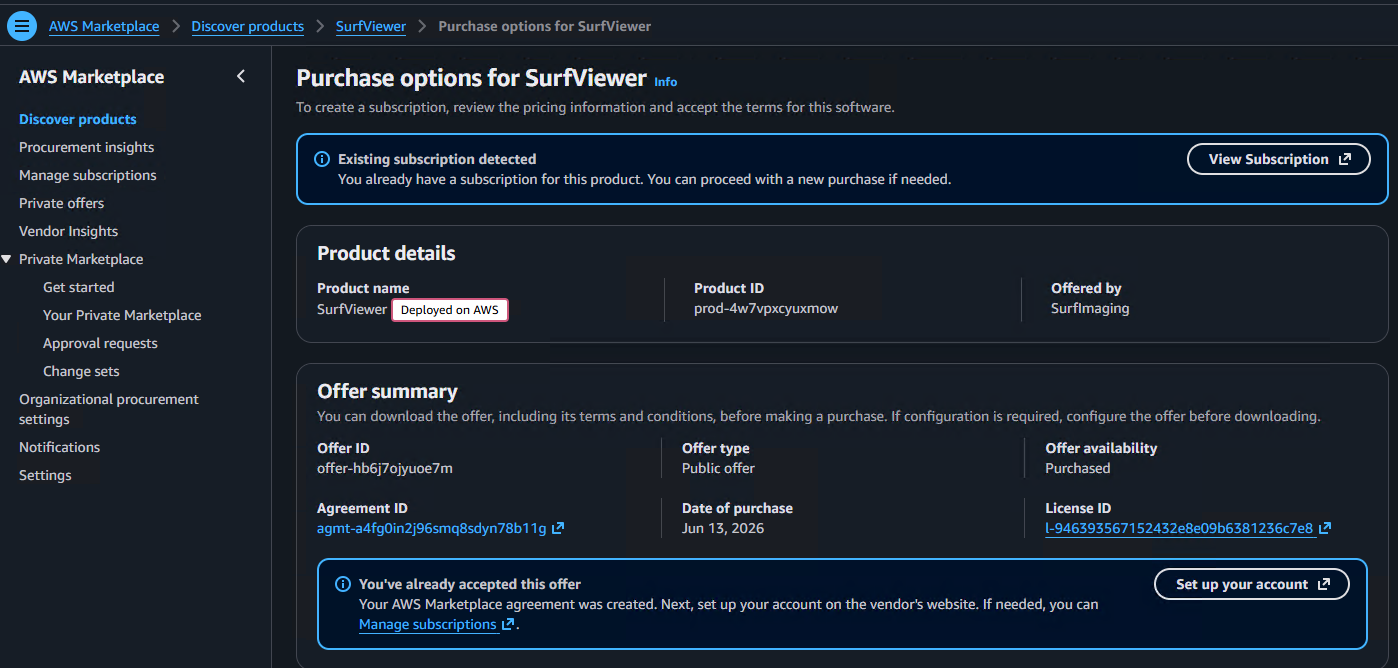
Open the vendor account setup from the purchase page
- After opening the active SurfViewer subscription, continue to the purchase page.
- Review the message that your AWS Marketplace subscription is already accepted.
- Select Set up your account to continue with the vendor-side account setup.
This step connects your AWS Marketplace subscription to the SurfViewer account setup flow before you return to AWS Marketplace to launch the deployment template.
5
Template
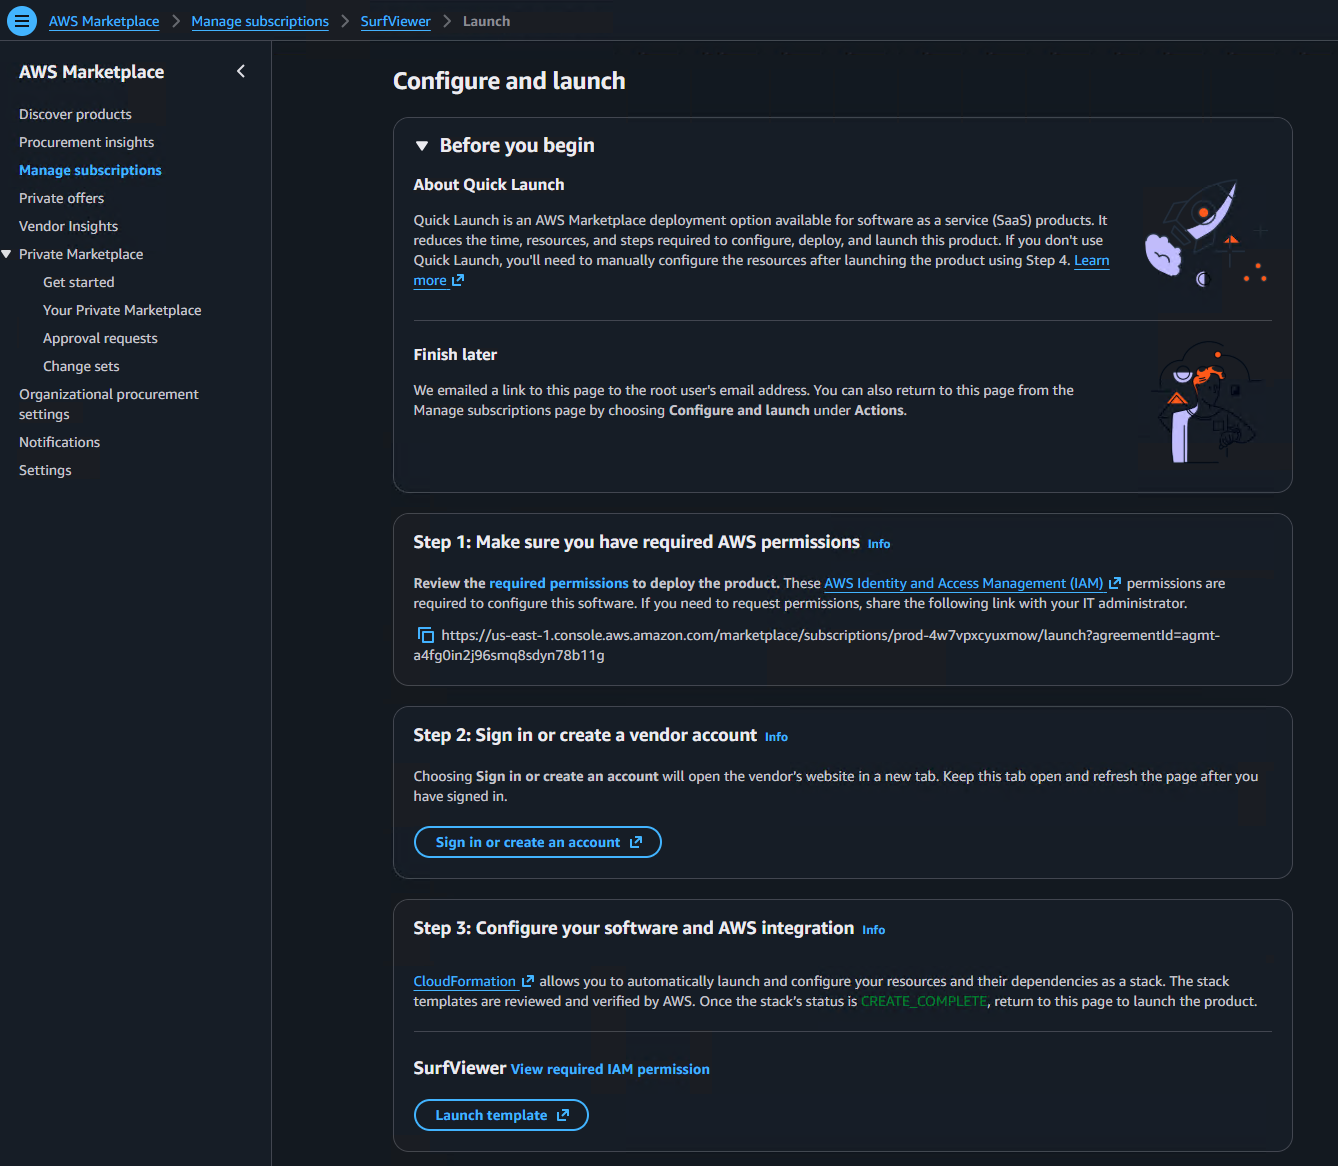
Use AWS Marketplace Quick Launch to open the CloudFormation template
- On the Configure and launch page, review the required permissions and complete the vendor sign-in step if prompted.
- Under Step 3, select Launch template.
6
Quick Launch
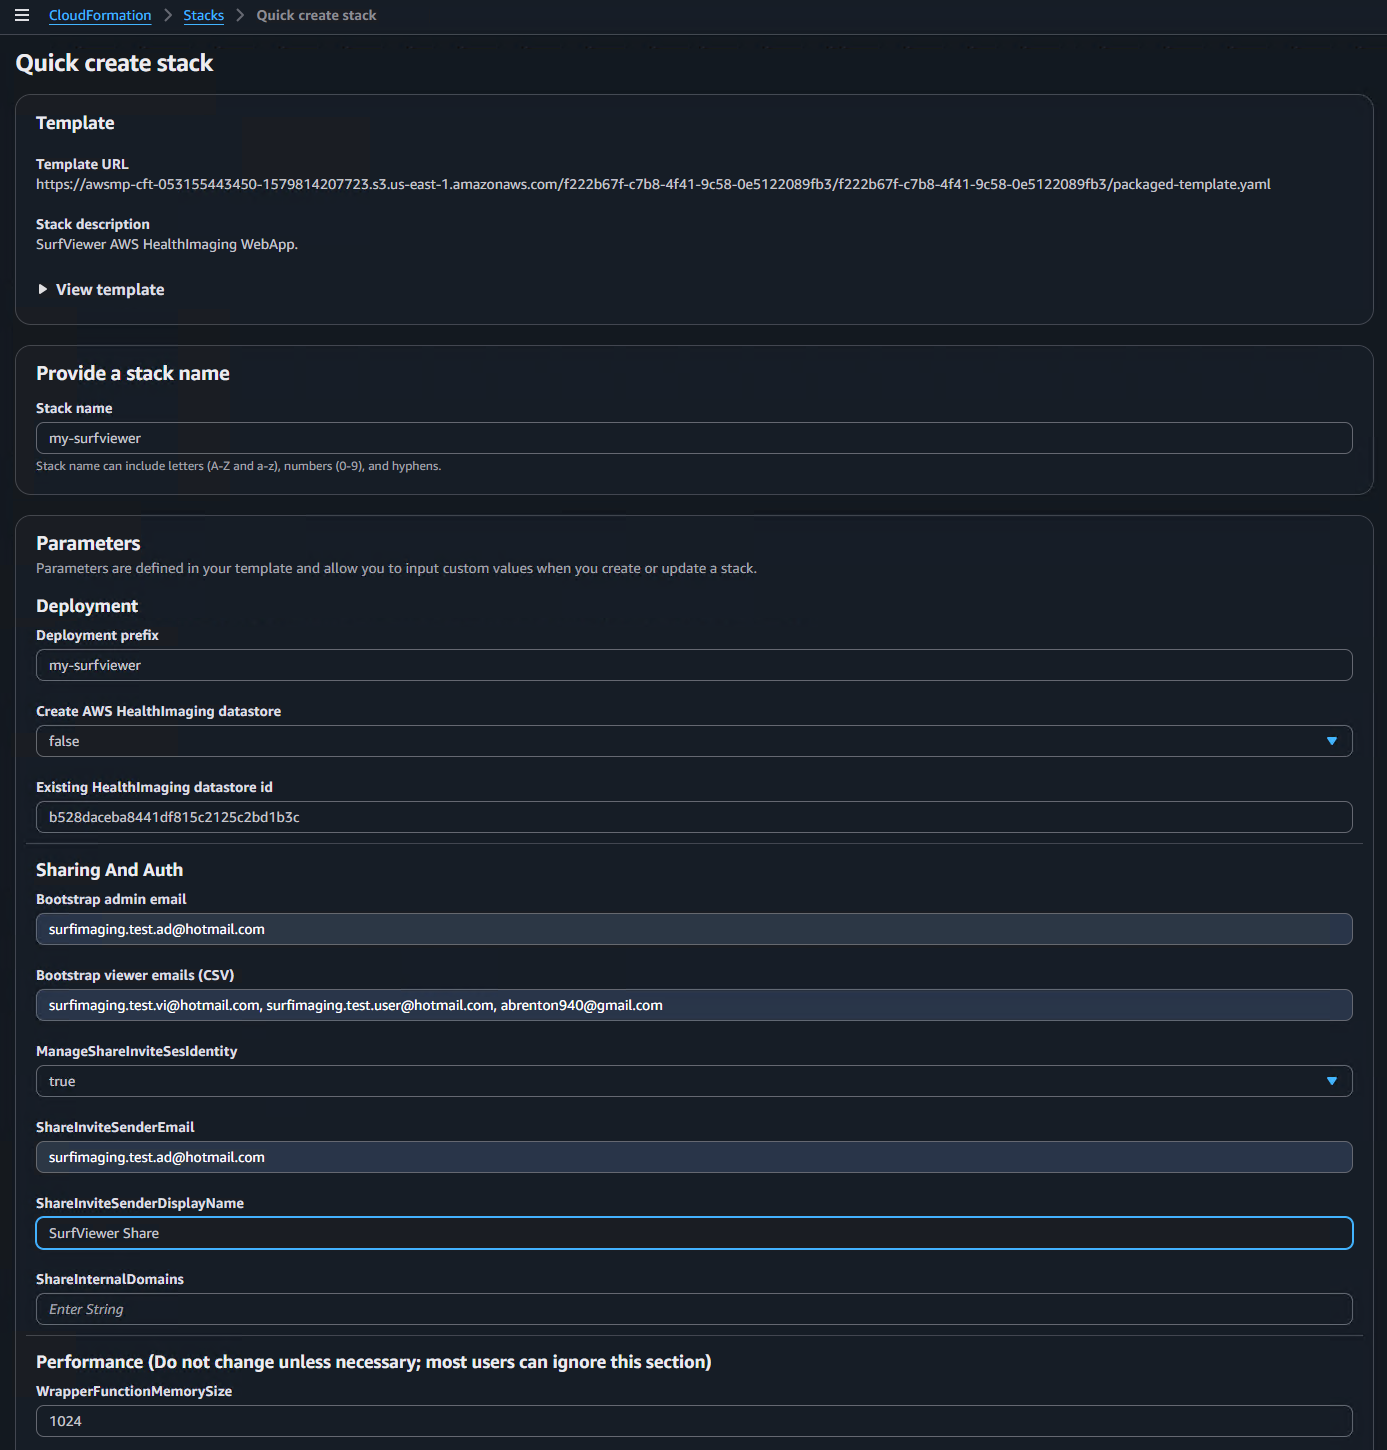
Create the SurfViewer stack
- Review the stack parameters provided by SurfViewer.
- Choose and fill in the naming prefix, datastore choice, admin email, viewer emails, and any optional viewer-hosting settings needed for your account.
- You may choose an existing Healthimaging datastore if available to reduce a fixed monthly cost.
- Confirm capabilities and create the stack.
- Watch the stack until it reaches CREATE_COMPLETE.
7
Deployment
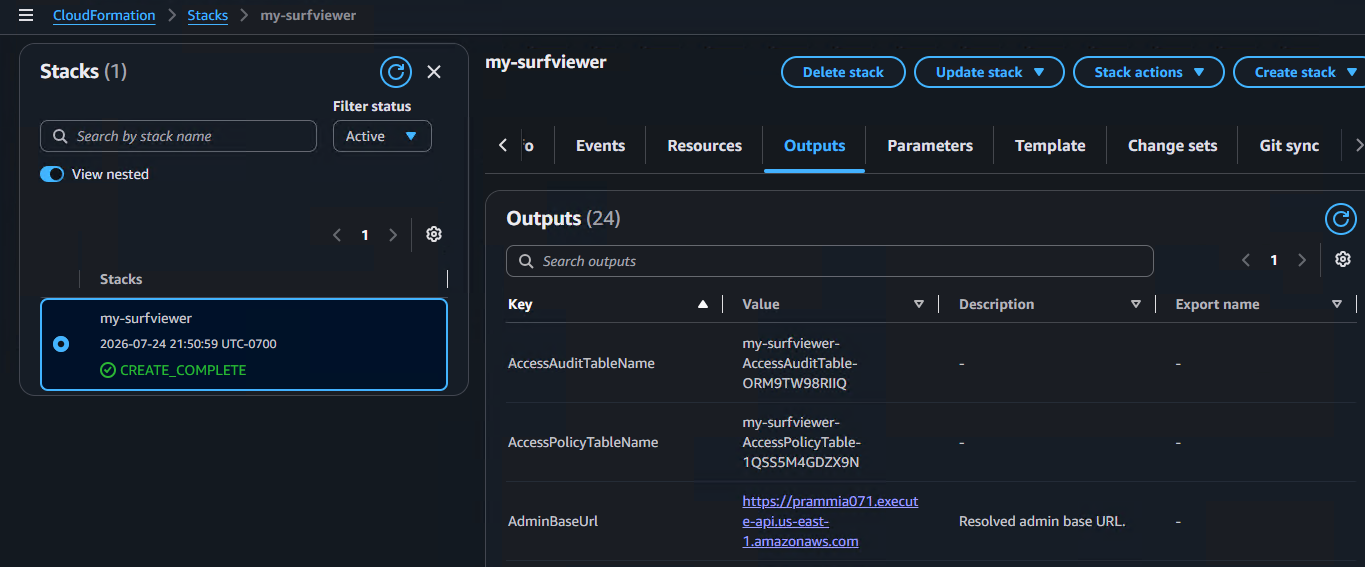
Open the completed stack and capture the entry URLs
- Open the completed CloudFormation stack.
- Review the outputs for the viewer URL, admin URL, API URL, and any generated supporting resources.
- The viewer URL is the AdminBaseURL/viewer, admin URL is AdminBaseURL/admin.
- Open the viewer URL for users and the admin URL for setup.
8
Admin
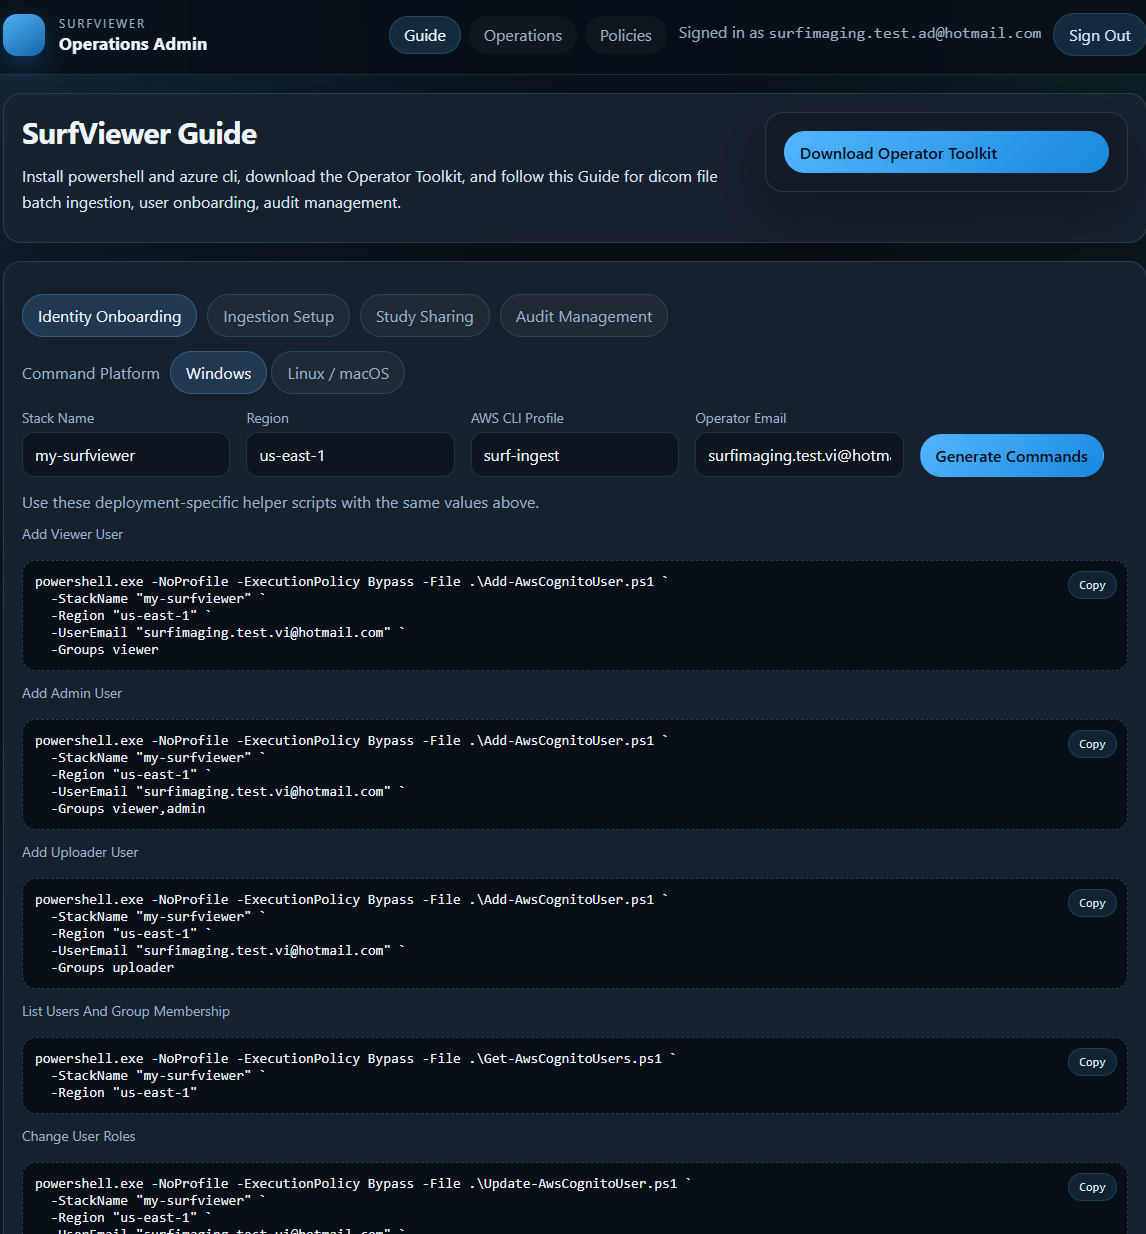
Continue with onboarding
- If you already input bootstrap admin and viewer emails, proceed to the next step.
- Open the admin page from the deployed environment.
- Use the generated commands and operational steps to prepare your tenant for viewer users, administrators, and sharing roles.
The admin guide is where you transition from infrastructure into tenant setup and operator enablement.
9
Ingestion
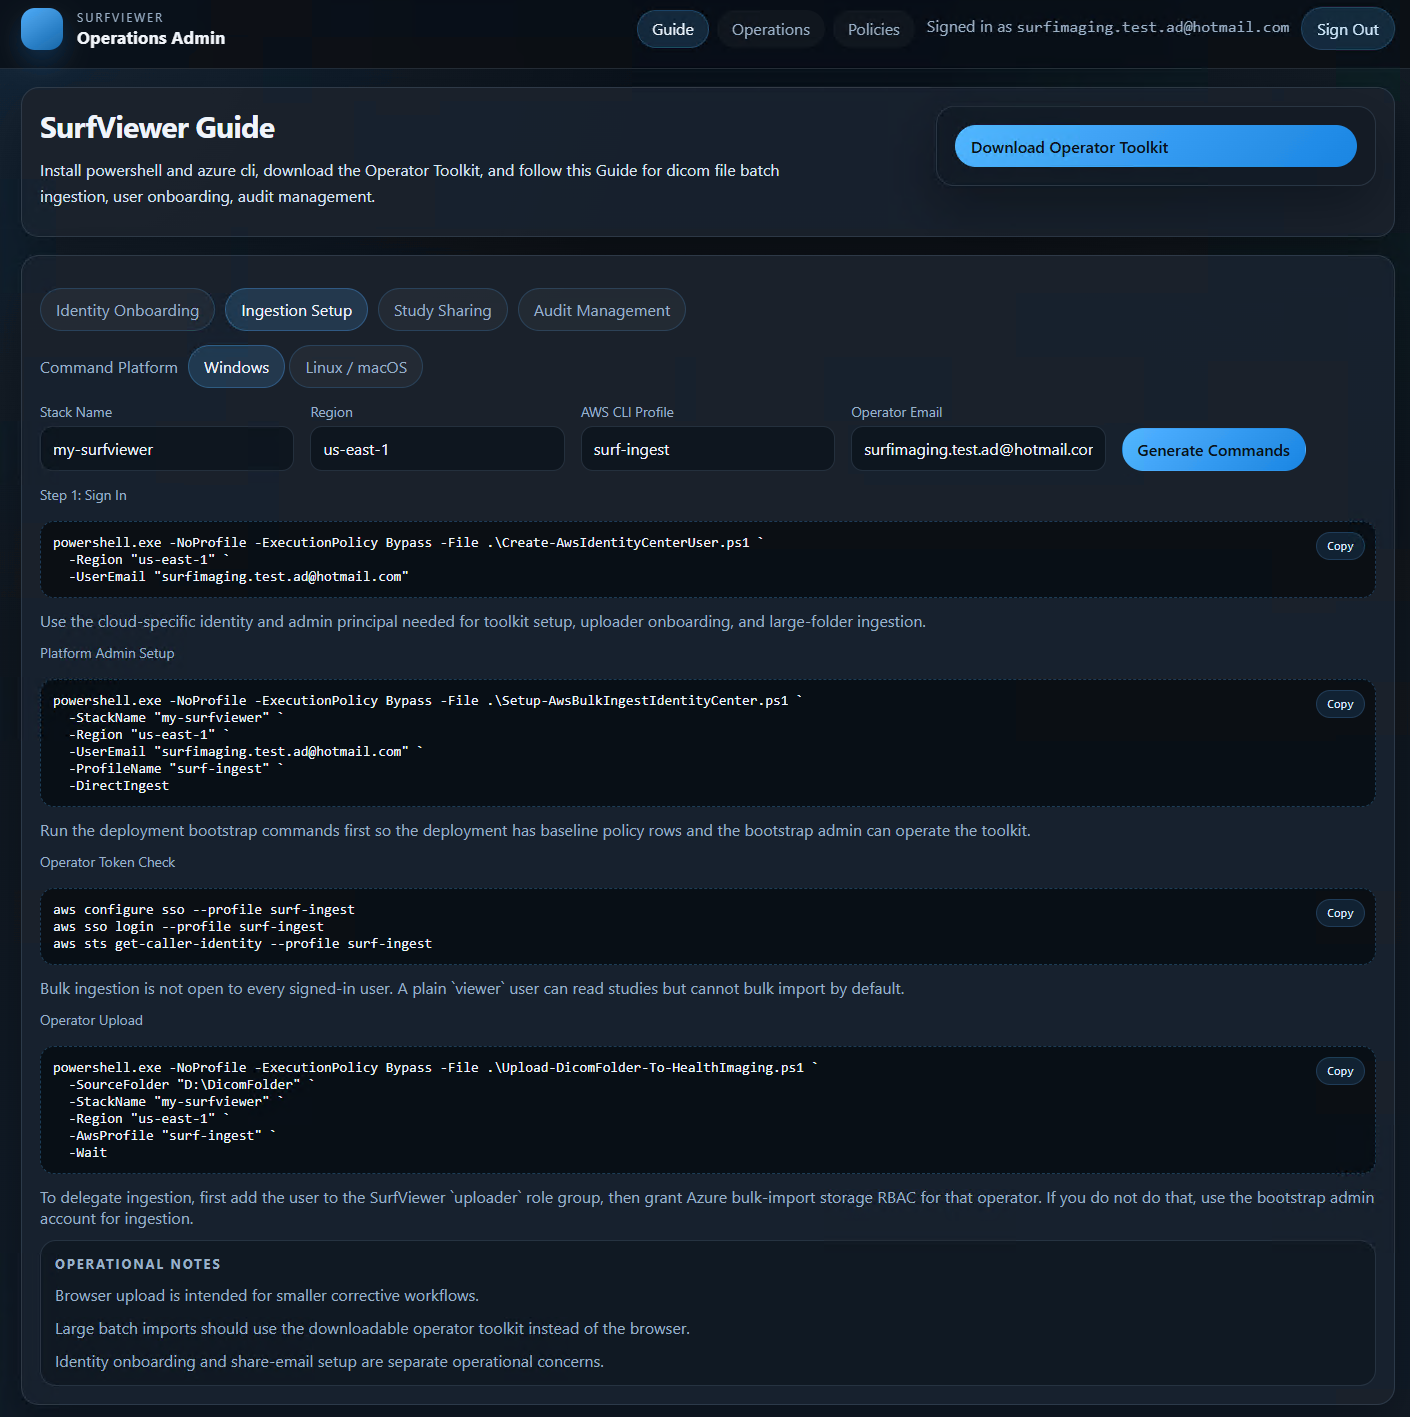
Finish ingestion setup
- Open the ingestion section from the admin guide.
- Enter the operator email address and generate the commands for your AWS account and target stack.
- Run the first two PowerShell commands as the AWS account administrator. These create the IAM Identity Center user if needed and assign the bulk-ingest permission set for this stack.
- Then have the operator run the AWS SSO sign-in commands followed by the upload command to complete ingestion setup and import studies.
Once onboarding and ingestion setup are complete, you are ready to ingest studies and open the viewer with real data.
10
Viewer
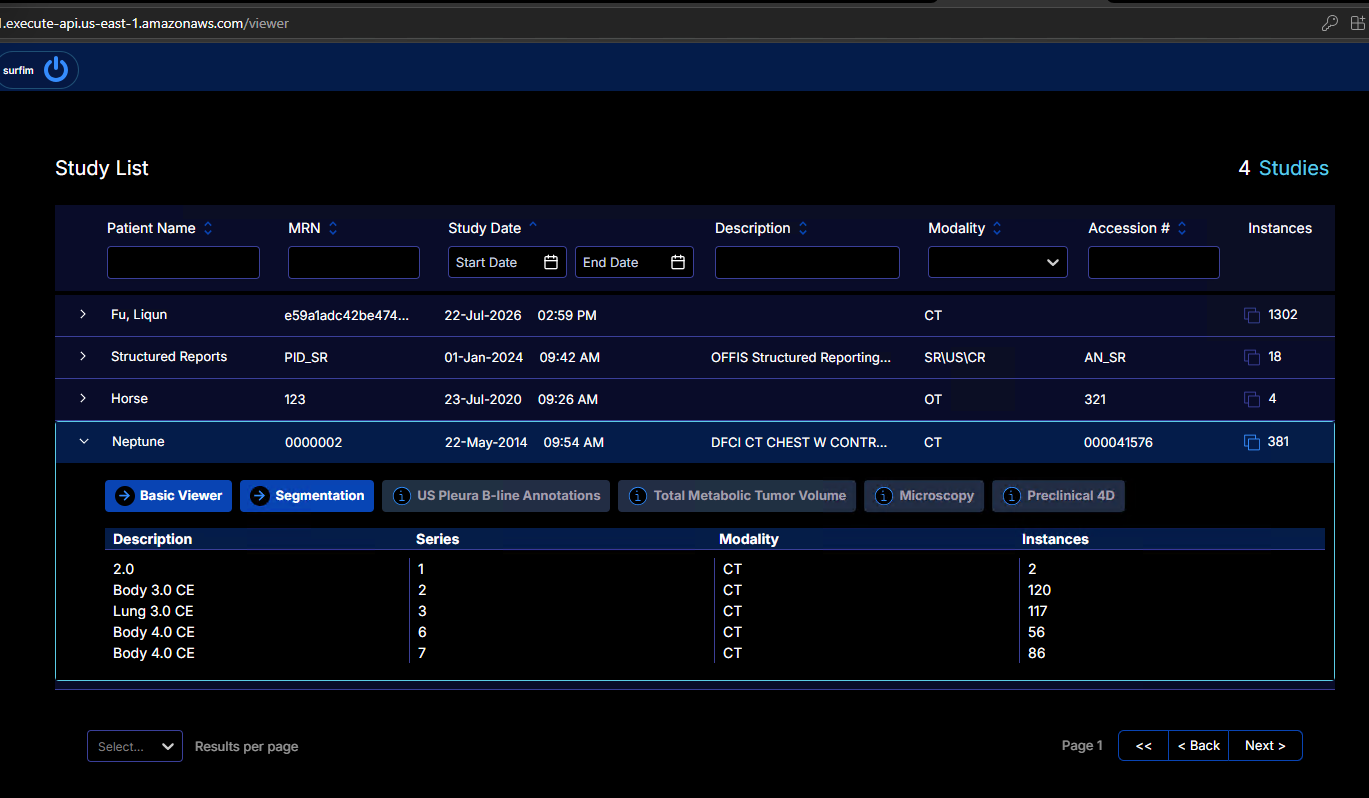
Open SurfViewer, sign in, and confirm the study list
- After onboarding and ingestion setup are complete, open the viewer URL from the completed stack outputs in your browser.
- Sign in with one of the viewer accounts configured for the deployment.
- Confirm that the study list loads successfully in SurfViewer.
SurfViewer extends the OHIF viewer workflow, making it easier for imaging teams to follow a familiar, clinically proven viewing experience.