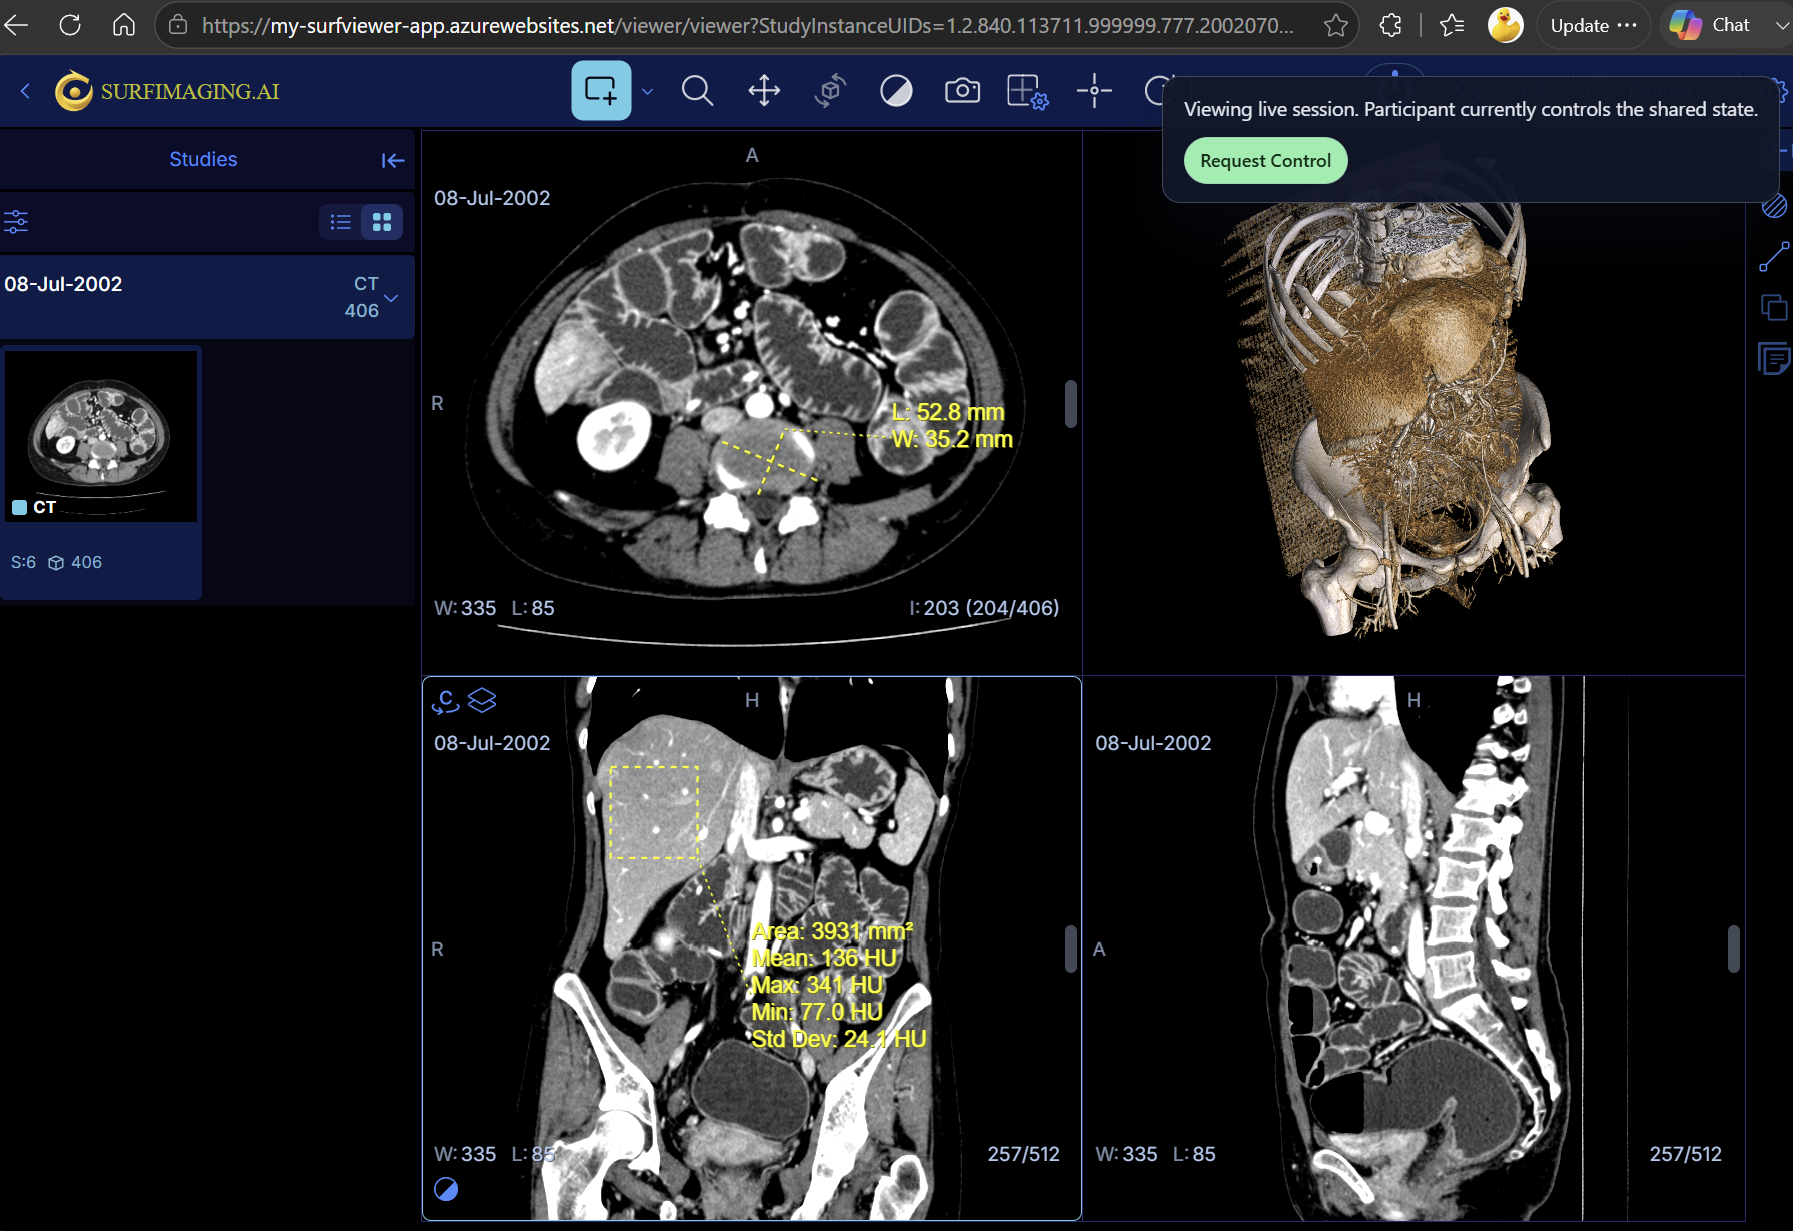
Prerequisites
Use an Azure subscription. If you do not already have one, you can create an Azure free account.
Make sure you have Azure deployment permissions and at least one administrator account ready for bootstrap and onboarding.
Confirm Azure Health Data Services are available in the region you plan to use by checking the Azure products by region table.
Before deployment, sign in to Azure CLI, select the target subscription, and register the required resource providers. For the command list, see the Azure landing page prerequisites.
1
Marketplace
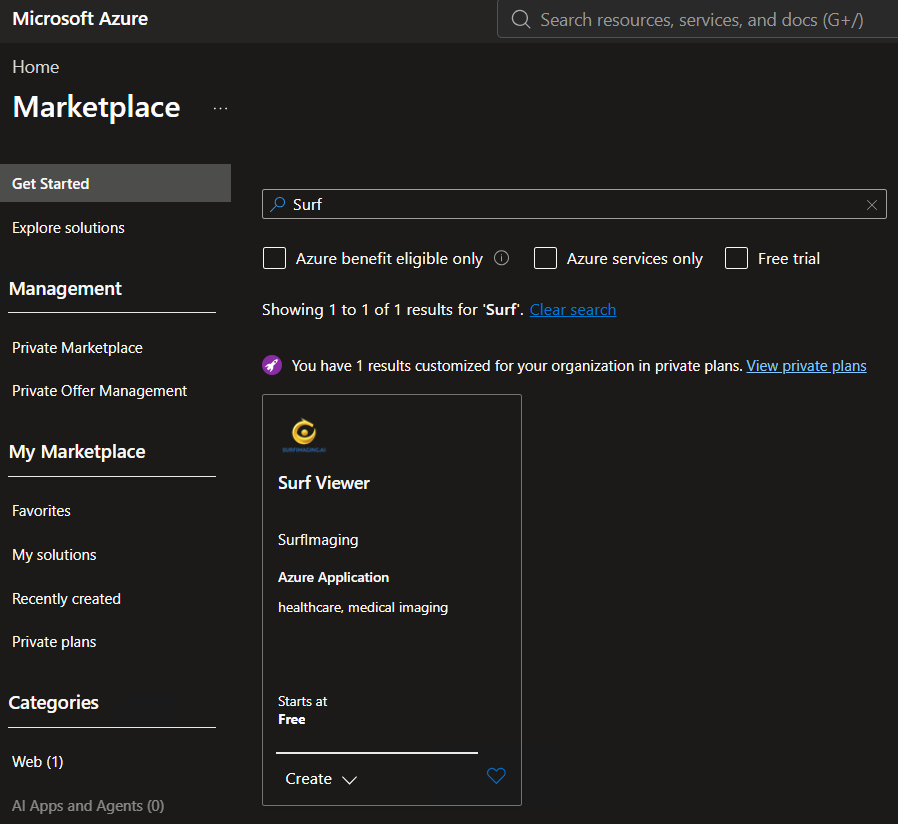
Find the Surf Viewer offer in Azure Marketplace
- Open Azure Marketplace and locate the Surf Viewer offer.
- Review the offer summary to confirm you are deploying the correct managed application.
- Select the offer to start deployment.
2
Deployment
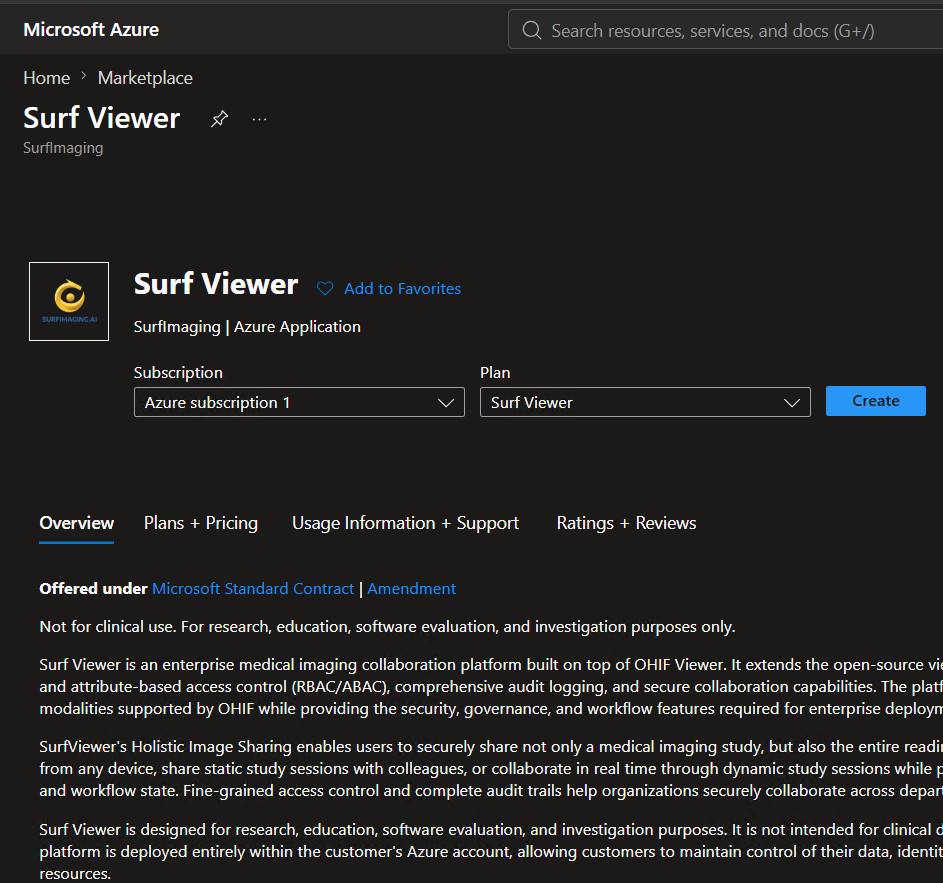
Start creation of the managed application
- Select Create from the offer page.
- Open the Marketplace deployment form for Surf Viewer.
- Begin the guided setup for your Azure environment.
Use a naming convention your operations team can easily recognize later for support, automation, and audit work.
3
Configuration
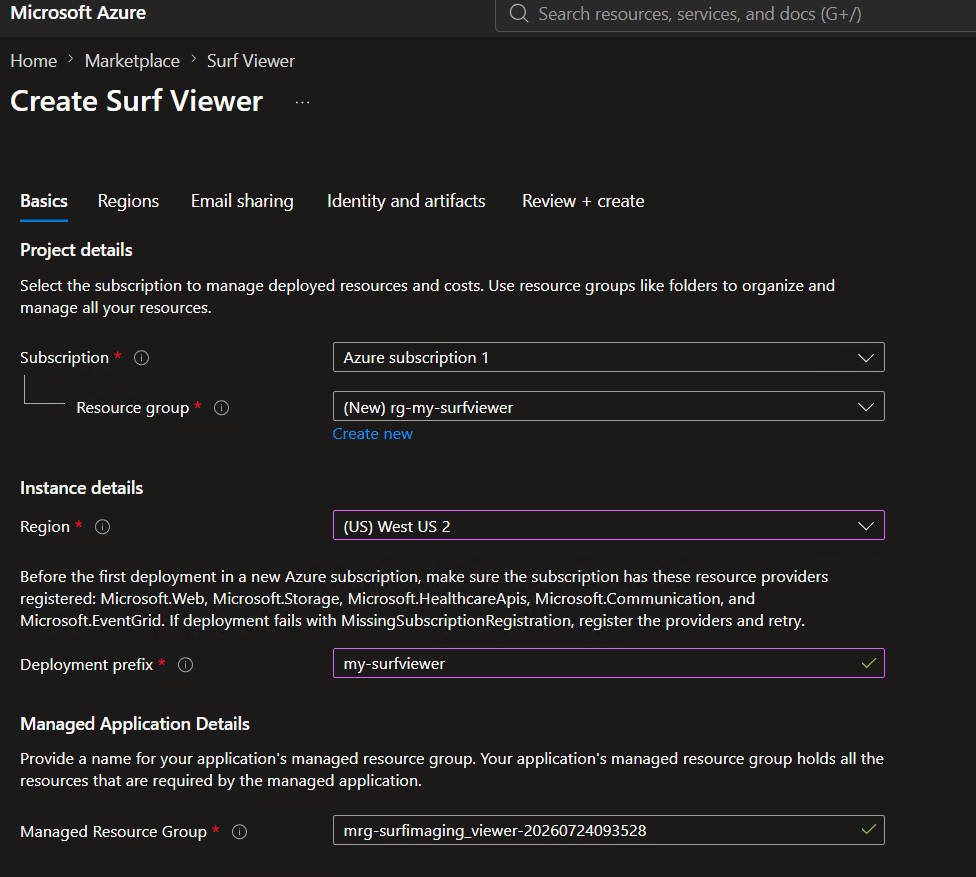
Create a resource group, select the region, and set the prefix
- Choose the subscription and create a new resource group if needed.
- Select the Azure region where you want Surf Viewer deployed.
- Set the deployment prefix used to name the created resources.
4
Configuration
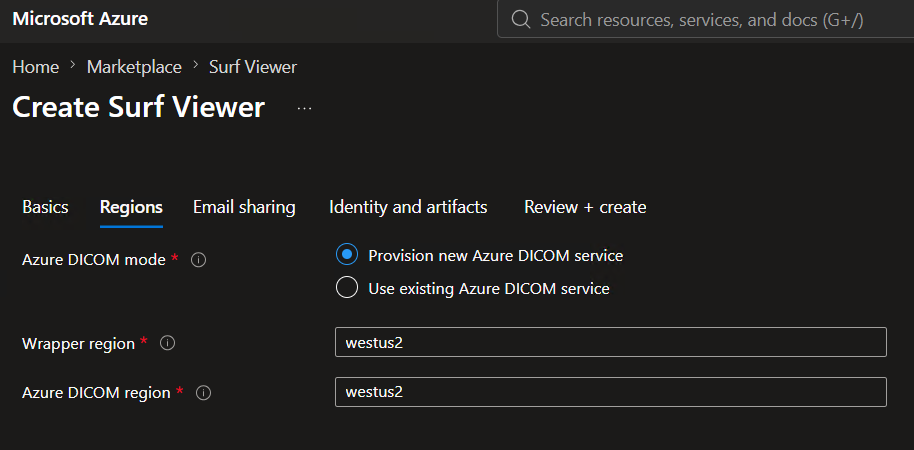
Provision a new Azure DICOM service
- Choose the option to Provision a new Azure DICOM service for this deployment.
5
Configuration
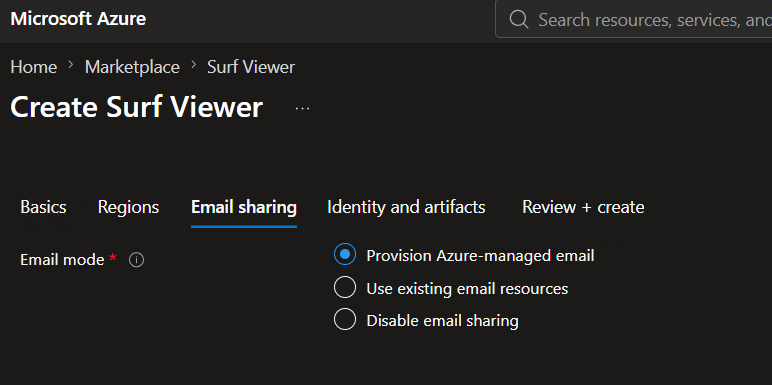
Set the provisioned notification email
- Choose the option to Provision a new Azure-managed email communication service.
6
Review
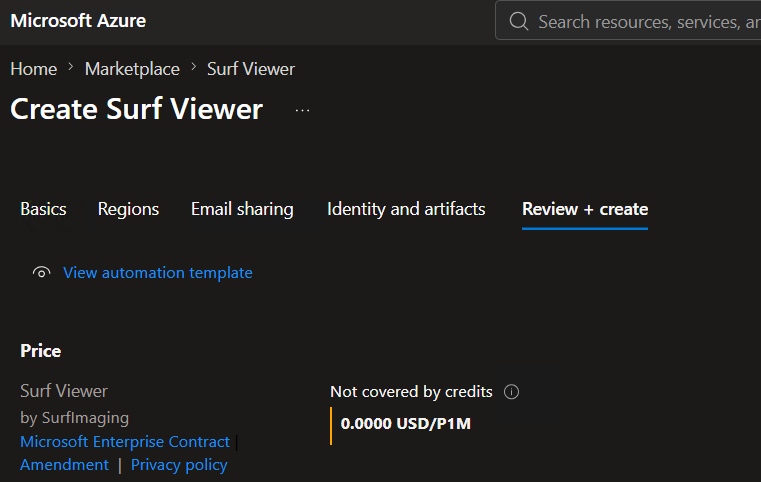
Accept terms and create the deployment
- Review the final configuration summary.
- Accept the Marketplace terms.
- Launch the managed application deployment.
7
Azure Resources
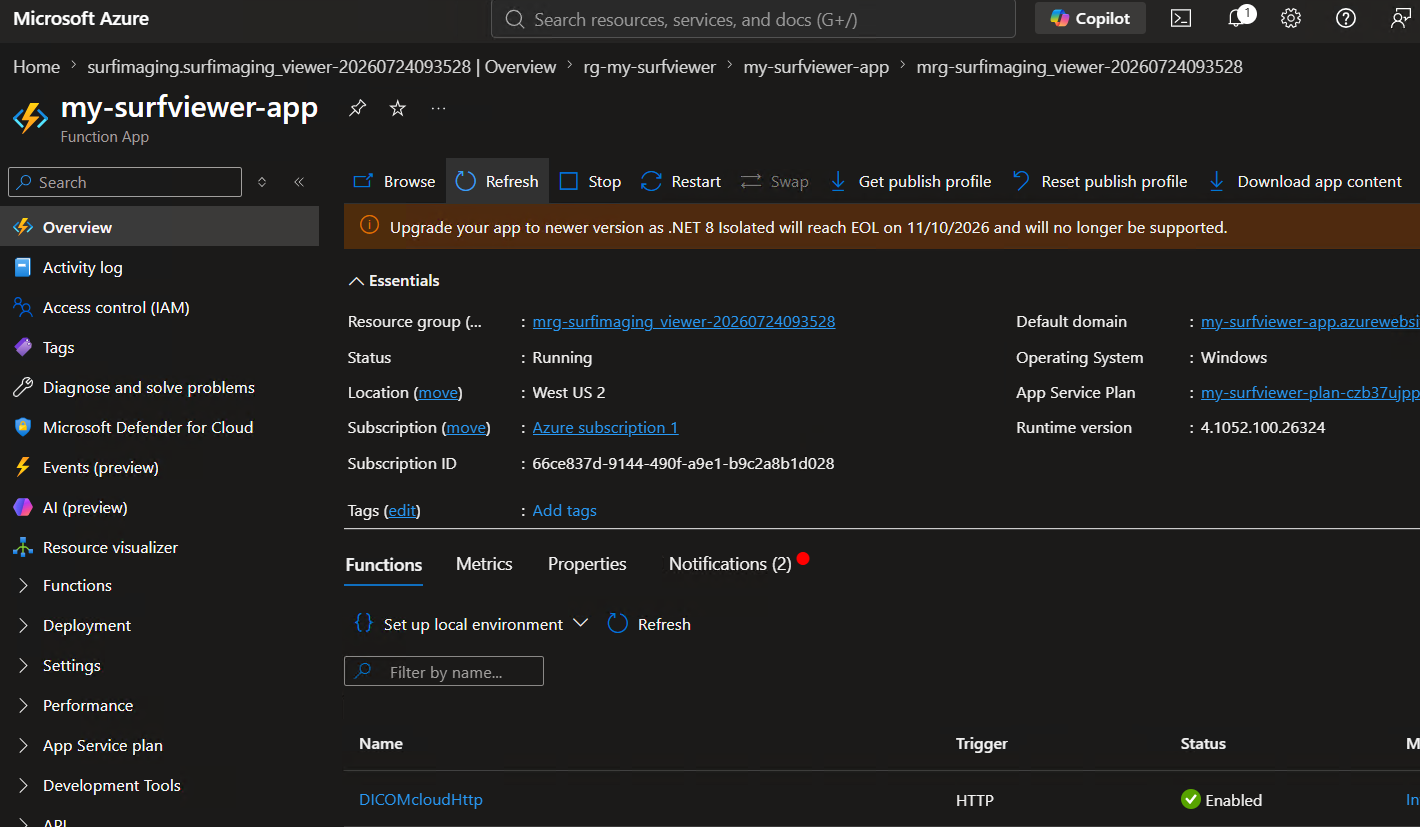
Open the deployed resources
- After deployment completes, select Go to resource.
- Review the managed application, resource group, and function app created for Surf Viewer.
- Capture the Function App URL you will use for first-time bootstrap.
8
Bootstrap
Run first-time administrator bootstrap
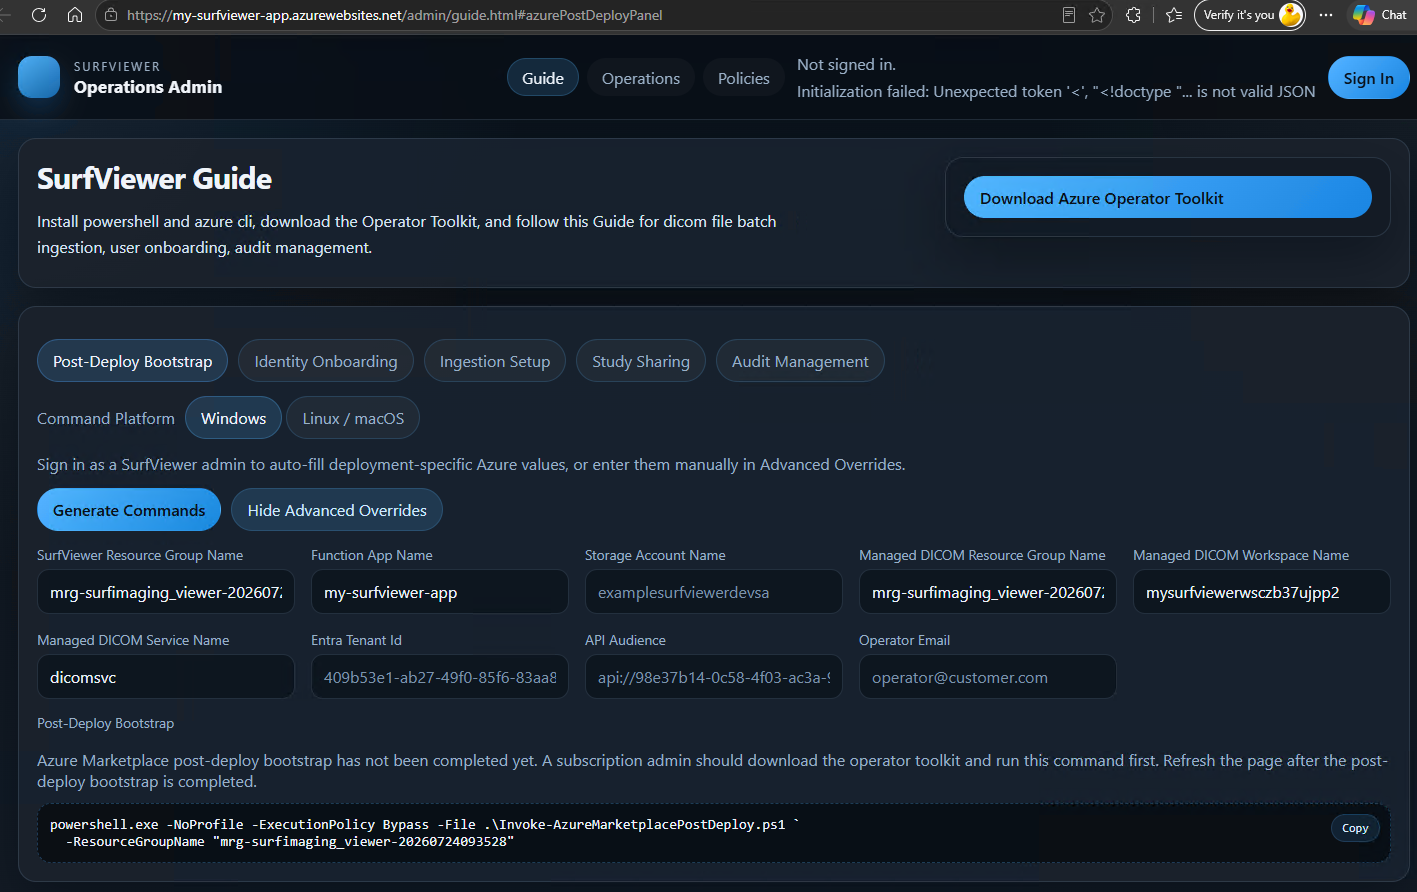
- Open the Function App URL. This will take you to the bootstrap page.
- Download and extract the toolkits. Sign in as an Azure administrator and run the bootstrap PowerShell command.
- Refresh the browser afterward.
This is the handoff point from infrastructure deployment to application enablement. Your app URL is https://my-surfviewer-app.azurewebsites.net, and your admin tool is at https://my-surfviewer-app.azurewebsites.net/admin.
9
Onboarding
Onboard your organization
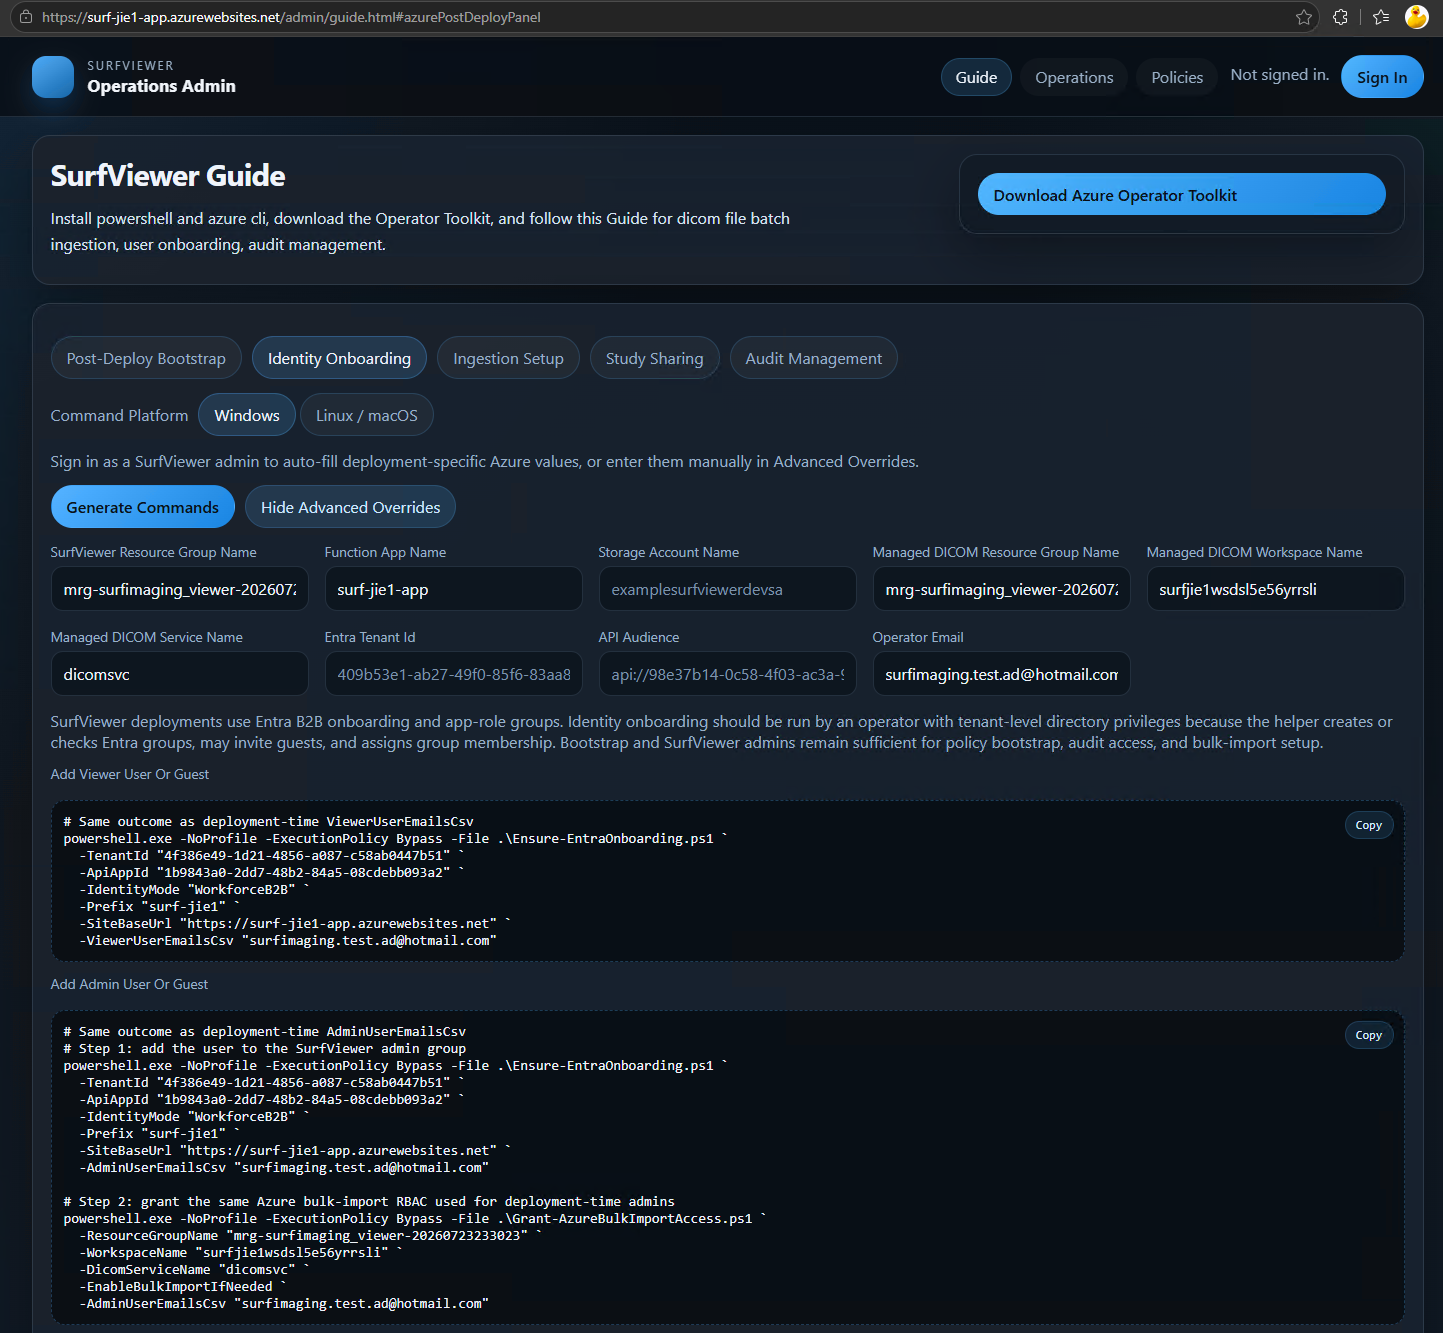
- Continue to Identity Onboarding.
- Enter "Operator Email" and select "Generate Commands".
- Run the generated commands for the operator for the appropriate roles.
- Repeat the process for each operator.
10
Ingestion
Bulk ingest imaging studies
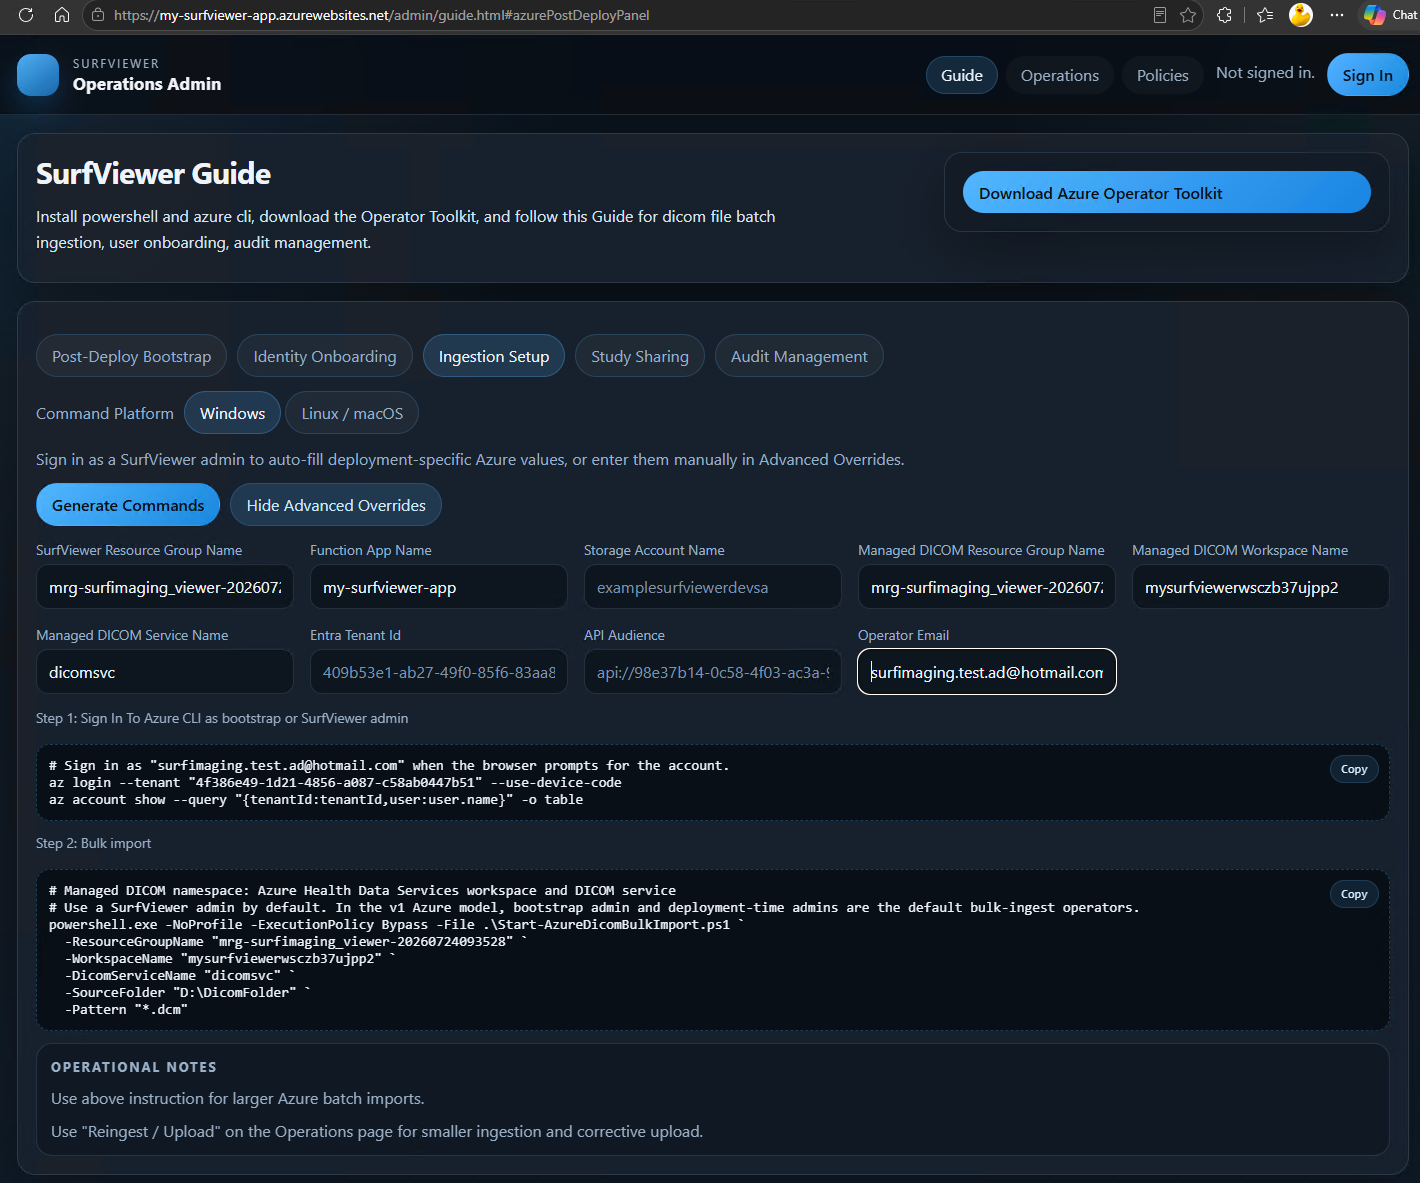
- Open the Ingestion Setup page.
- Enter "Operator Email" and select "Generate Commands".
- Run the generated commands.
- Important note: due to a recent Azure CLI update, run "az login --tenant tenant_id --allow-no-subscriptions" instead of "az login --tenant tenant_id --use-device-code".
- Important note: choose the source folder for the studies to be ingested.
11
Viewer Access
Open the viewer in the browser and sign in
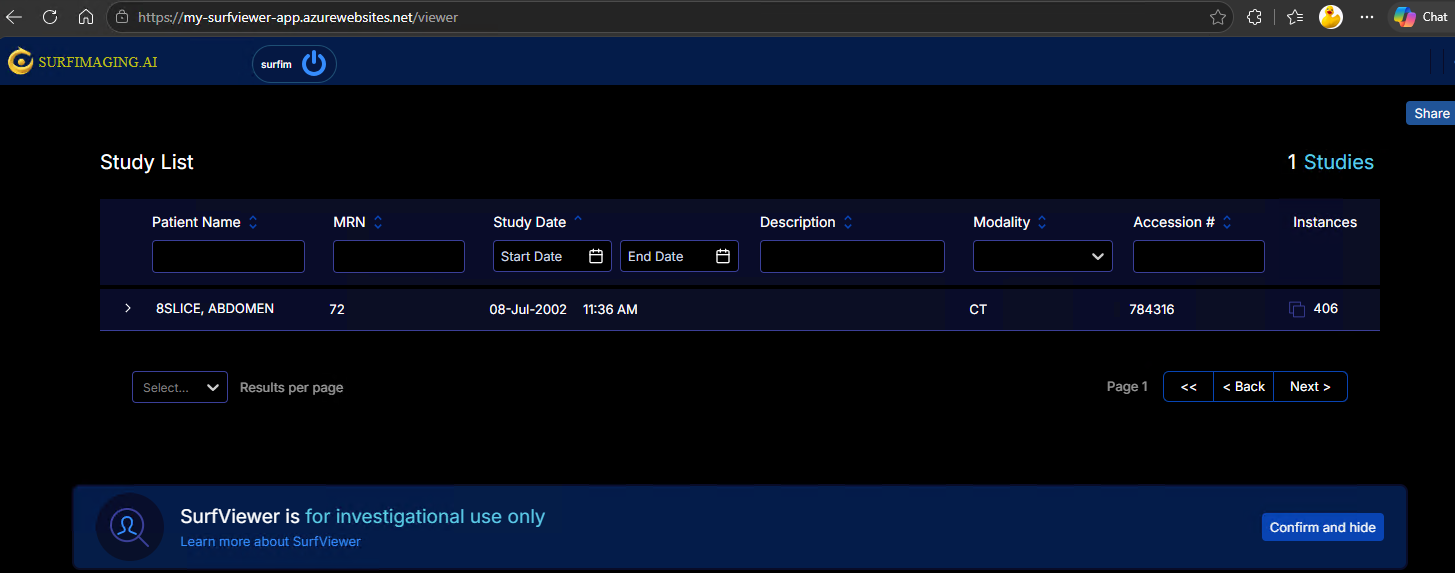
- Open the Surf Viewer application URL in your browser.
- Sign in as a viewer using the account you onboarded for the environment.
- Confirm that the study list loads successfully after sign-in.
12
Viewer
Open a study and start a workspace
- From the study list, open the ingested study you want to review.
- Work with the study in Surf Viewer.
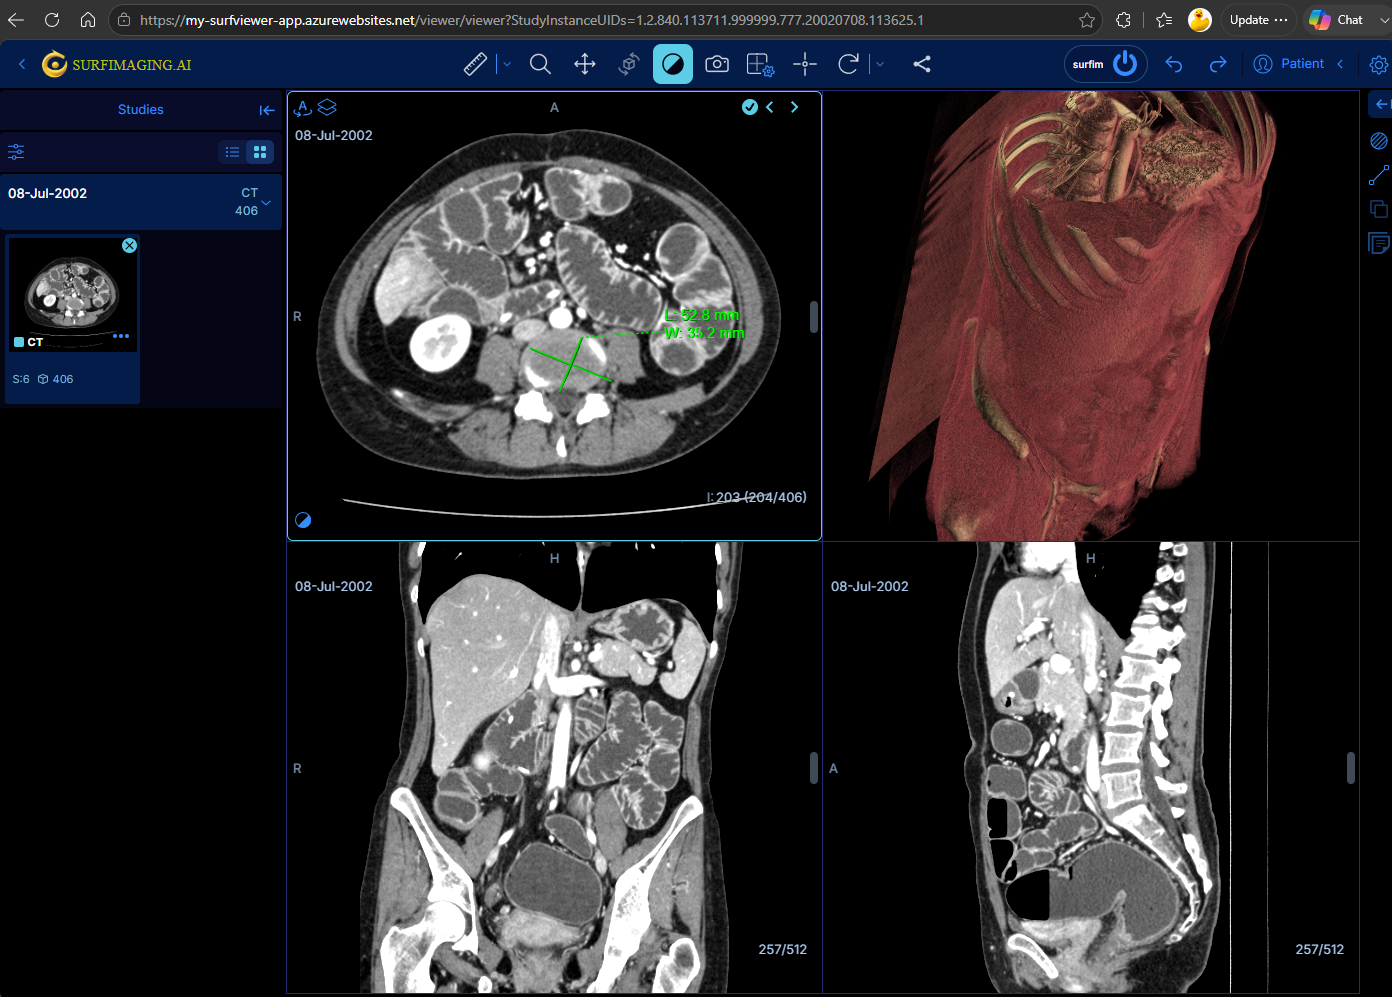
13
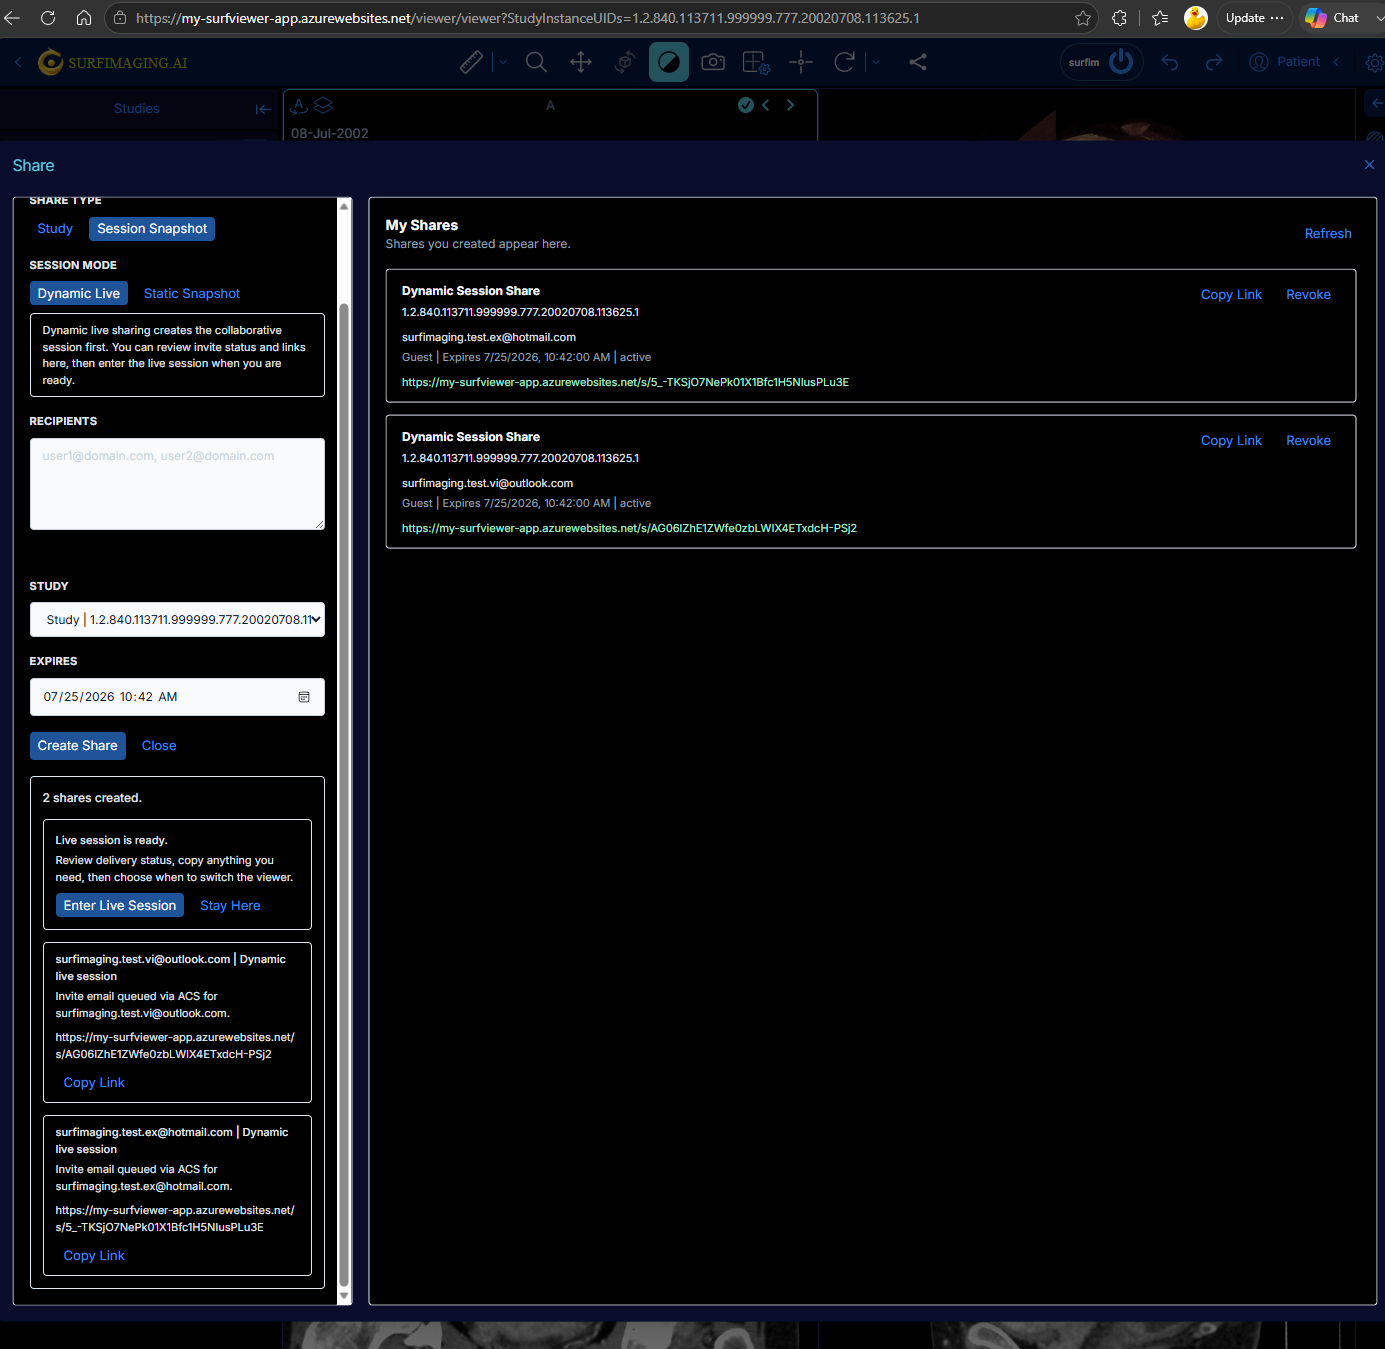
Workspace Sharing
Open the sharing panel for internal and external access
- From the active study session, open the sharing panel.
- Input emails of your organization internal and approved external participants that we want to share with your workspace.
- Select "Create Share".
- "Enter Live Session" afterward.
14
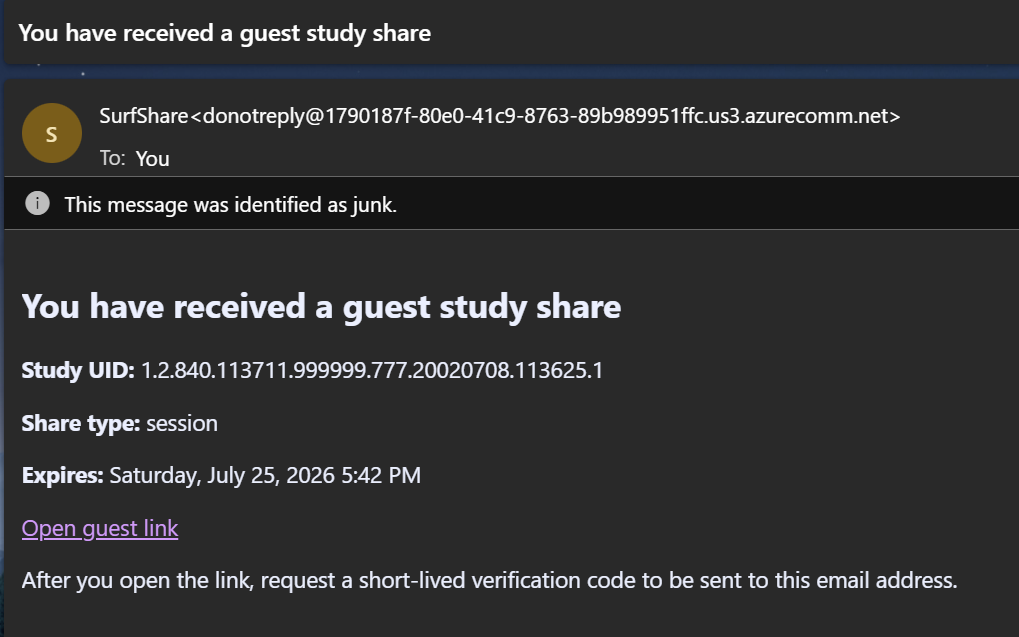
Sharing Invitation
Invitation sent to participants
- Open the workspace sharing invitation email. (Check for junk or spam folders.)
- Follow the link and instructions to join the shared workspace.
This is the step that turns the deployed platform into an operational collaboration environment across institutional boundaries.
15
Collaboration
Realtime collaboration in the shared workspace
- Join the shared workspace as invited users.
- Review the same study together and collaborate within the workspace.
- One participant may request control of the viewer, select hanging protocols, create annotations and measurements, and manipulate the viewport image.
- Changes are immediately visible to all participants so they can discuss the case in real time.
At this point, your Azure deployment is fully operational as an enterprise-grade medical imaging collaboration platform.